Source Code can be find on Github:
https://github.com/sunwangshu/DarkMaze
Overview
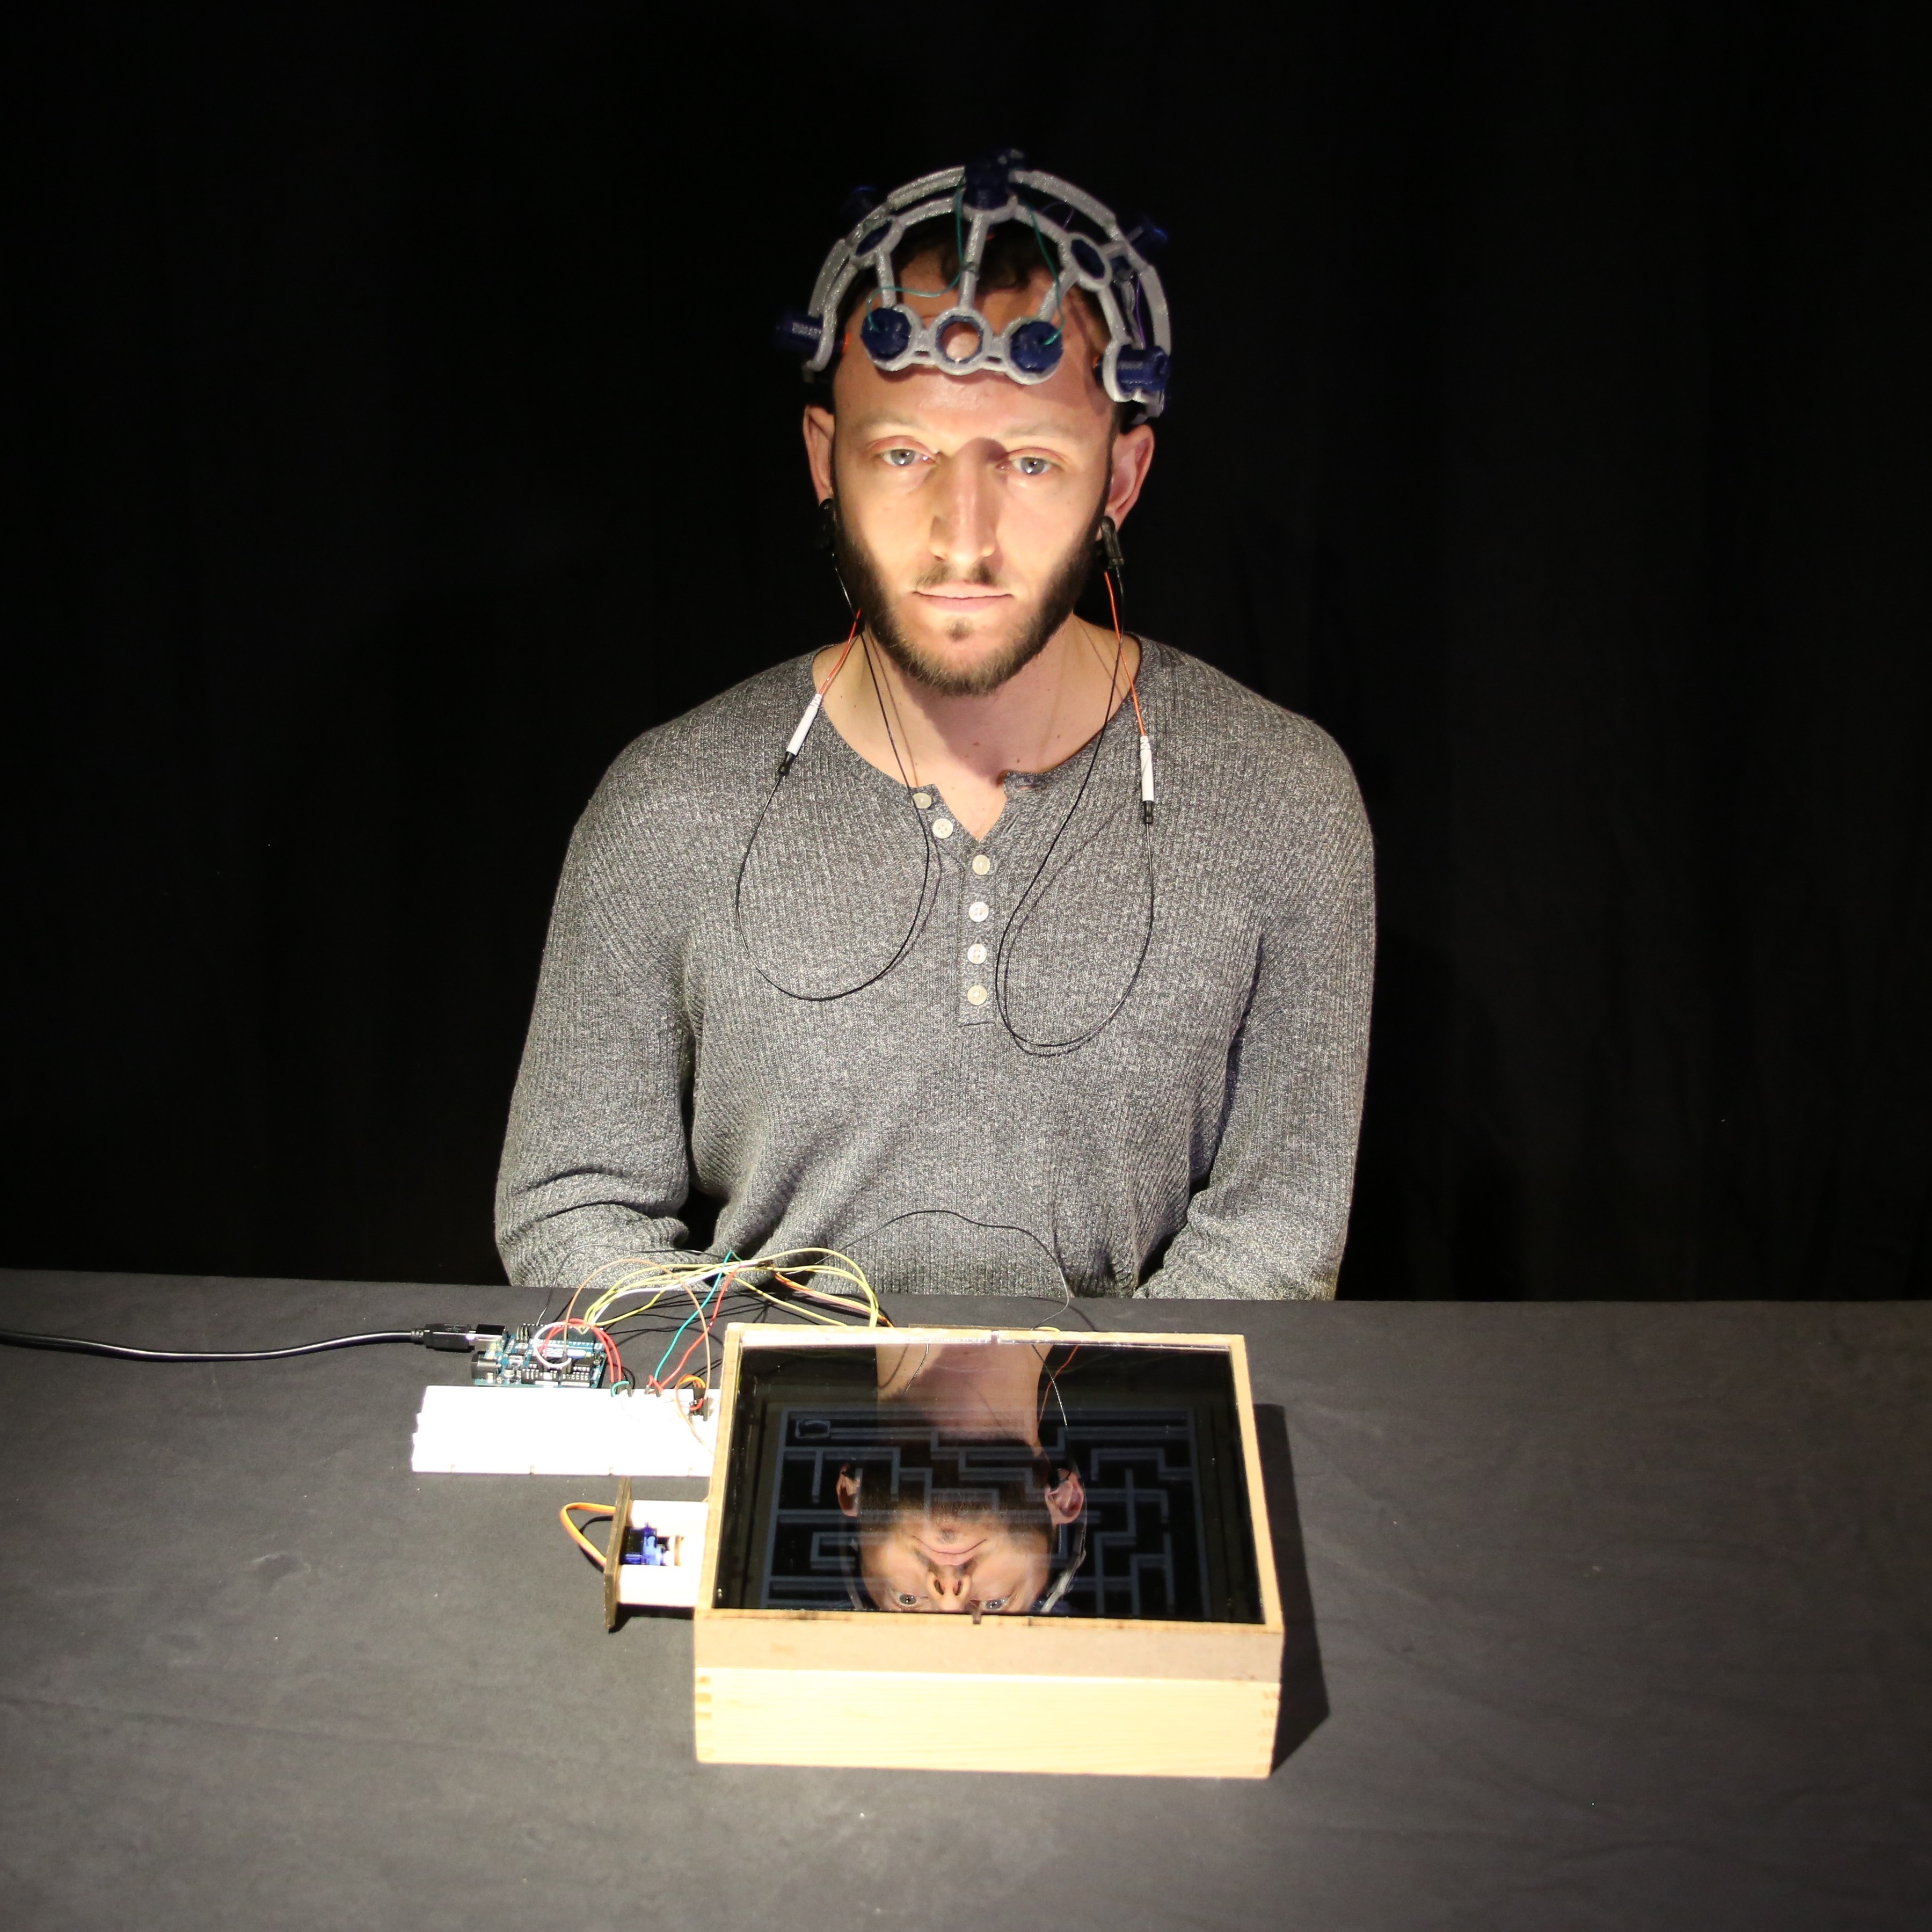
Dark Maze is our final project for the class Body Electric taught by Conor Russomanno in the NYU Interactive Telecommunications Program (ITP). It is a physical maze game designed for focus and memory training, and controlled by mind focus, eye blinking and head tilting. It was proudly made by Jordan Frand, Mathura MG, Christina Choi and myself, Wangshu Sun.
During our idea brainstorming, Jordan pitched up an idea named Dark Maze: a brain-controlled physical maze that’s totally dark, unless you light it up with your focus. Since you can’t hold your focus very long, the maze will keep going dark, necessitating that you remember the maze. Thus it serves as a memory training tool. We all thought it cool and decided to work on it.
After discussing further, we wanted to tap into OpenBCI’s whole potential of recording EEG / EMG and accelerometer data, so we decided to design a physical game that can be played by focus (EEG) / eye blinking (EMG) and head tilting (accelerometer). Generally head tilting and eye blinking are mapped to up-down/left-right movement. A focused mind can turn the light on, while unfocused mind will turn the light off. Triggers of eye-blinking and head-tilting are based on the EMG visualizer algorithm in the graphical user interface (GUI), and focus is based on Fast-Fourier Transform (FFT) data in alpha and beta bands (details discussed later).
For the physical maze, it was a ready-made tilt maze with servo motors attached to it (originally envisioned as electromagnetically-controlled, but this was changed later). We used serial communication to send data, so that Processing not only runs the OpenBCI GUI to receive data from OpenBCI board, but also sends signals to the Arduino Uno board to control the motors of the physical maze.
In summary:
OpenBCI Board -> OpenBCI GUI in Processing (with our additional codes) -> Arduino Uno
Light on: Focus
Left: Blink left eye
RIght: Blink right eye
Up: Lean forward
Down: Lean backward
Dark Maze V1 – A Unity Maze Game

Above is our first version of Dark Maze. The first step was to create a digital prototype of the game. To make the game like the physical tilt maze that involves collision, Unity is a good choice because it has collision detection.
These were the steps we took:
- Locating useful data from OpenBCI GUI code
- Designing experiments to collect data
- Designing algorithms to detect focus / eye blinking/ head tilting events
- Building a game prototype with Unity
- Sending events from Processing to Unity
1. Locating useful data from OpenBCI GUI
We found that the raw EEG/EMG data could be retrieved inside EEG_Processing.pde (DataProcessing_User.pde if you are using OpenBCI GUI v2.0) for further use. The FFT analysis data (frequency components of a data segment) of raw EEG/EMG data over time could also be retrieved there.
The actual channels in use for both eye-blinking and focus were channels 1 & 2 (two front electrodes Fp1, Fp2 in 10-20 system). For head tilting we used accelerometer data.
2. Designing experiments to collect data
We asked Jordan to perform several different tasks to collect data, namely blinking left and right eyes intentionally, tilting head back and forth, and focusing for a period of time then trying to lose focus for another period. We recorded EEG data with OpenBCI GUI, and at the same time we did screen recording with audio so we can annotate the time by voice when a task starts/ stops.
3. Designing algorithms to detect different events
Mathura, Jordan and Christina made algorithms to detect eye-blinking and head tilting, while I made the algorithm to tell whether a person is focused or not. For focus we asked Jordan to read a book / focus on a banana.
Focus:
Suggested by our teacher Conor, I started from looking at alpha band (frequency components between 7.5 – 12 Hz) and beta band (frequency components between 12.5 – 30 Hz) amplitudes from the FFT plot. By looking at these two frequency bands of playback data when Jordan was supposed to be focused, it seemed his focused state can be characterized as high amplitudes in alpha band and low amplitudes in beta band.

Then I began to calculate averaged alpha and beta amplitudes as a representation of alpha and beta band power. They are defined as averaged FFT bin amplitudes in alpha or beta frequency band.
So, averaged values alpha_avg and beta_avg are defined as:
alpha_avg = {average(FFT_value_uV) | FFT_freq_Hz in [7.5,12.5] }
beta_avg = {average(FFT_value_uV) | (FFT_freq_Hz in (12.5, 30] }
Below is the edited Processing code in EEG_Processing.pde
float FFT_freq_Hz, FFT_value_uV;
int alpha_count = 0, beta_count = 0;

for (int Ichan=0; Ichan < 2; Ichan++) {  // only consider first two channels
  for (int Ibin=0; Ibin < fftBuff[Ichan].specSize(); Ibin++) {
     FFT_freq_Hz = fftBuff[Ichan].indexToFreq(Ibin);
     FFT_value_uV = fftBuff[Ichan].getBand(Ibin);

     if (FFT_freq_Hz >= 7.5 && FFT_freq_Hz <= 12.5) { //FFT bins in alpha range
         alpha_avg += FFT_value_uV;
         alpha_count ++;
     } else if (FFT_freq_Hz > 12.5 && FFT_freq_Hz <= 30) {
         beta_avg += FFT_value_uV;
         beta_count ++;
     }
  }
}

alpha_avg = alpha_avg / alpha_count;  // average uV per bin
beta_avg = beta_avg / beta_count;  // average uV per bin
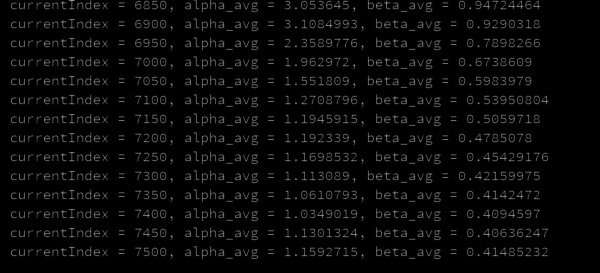
Below is the printed values of alpha_avg and beta_avg. (Notice Index = 7100 is the time when jordan began to start focus)
Next, to build an algorithm that can separate focused state from unfocused state, I exported the alpha_average, beta_average over time to an Excel spreadsheet and visualized it with diagrams (inspired by Mathura).
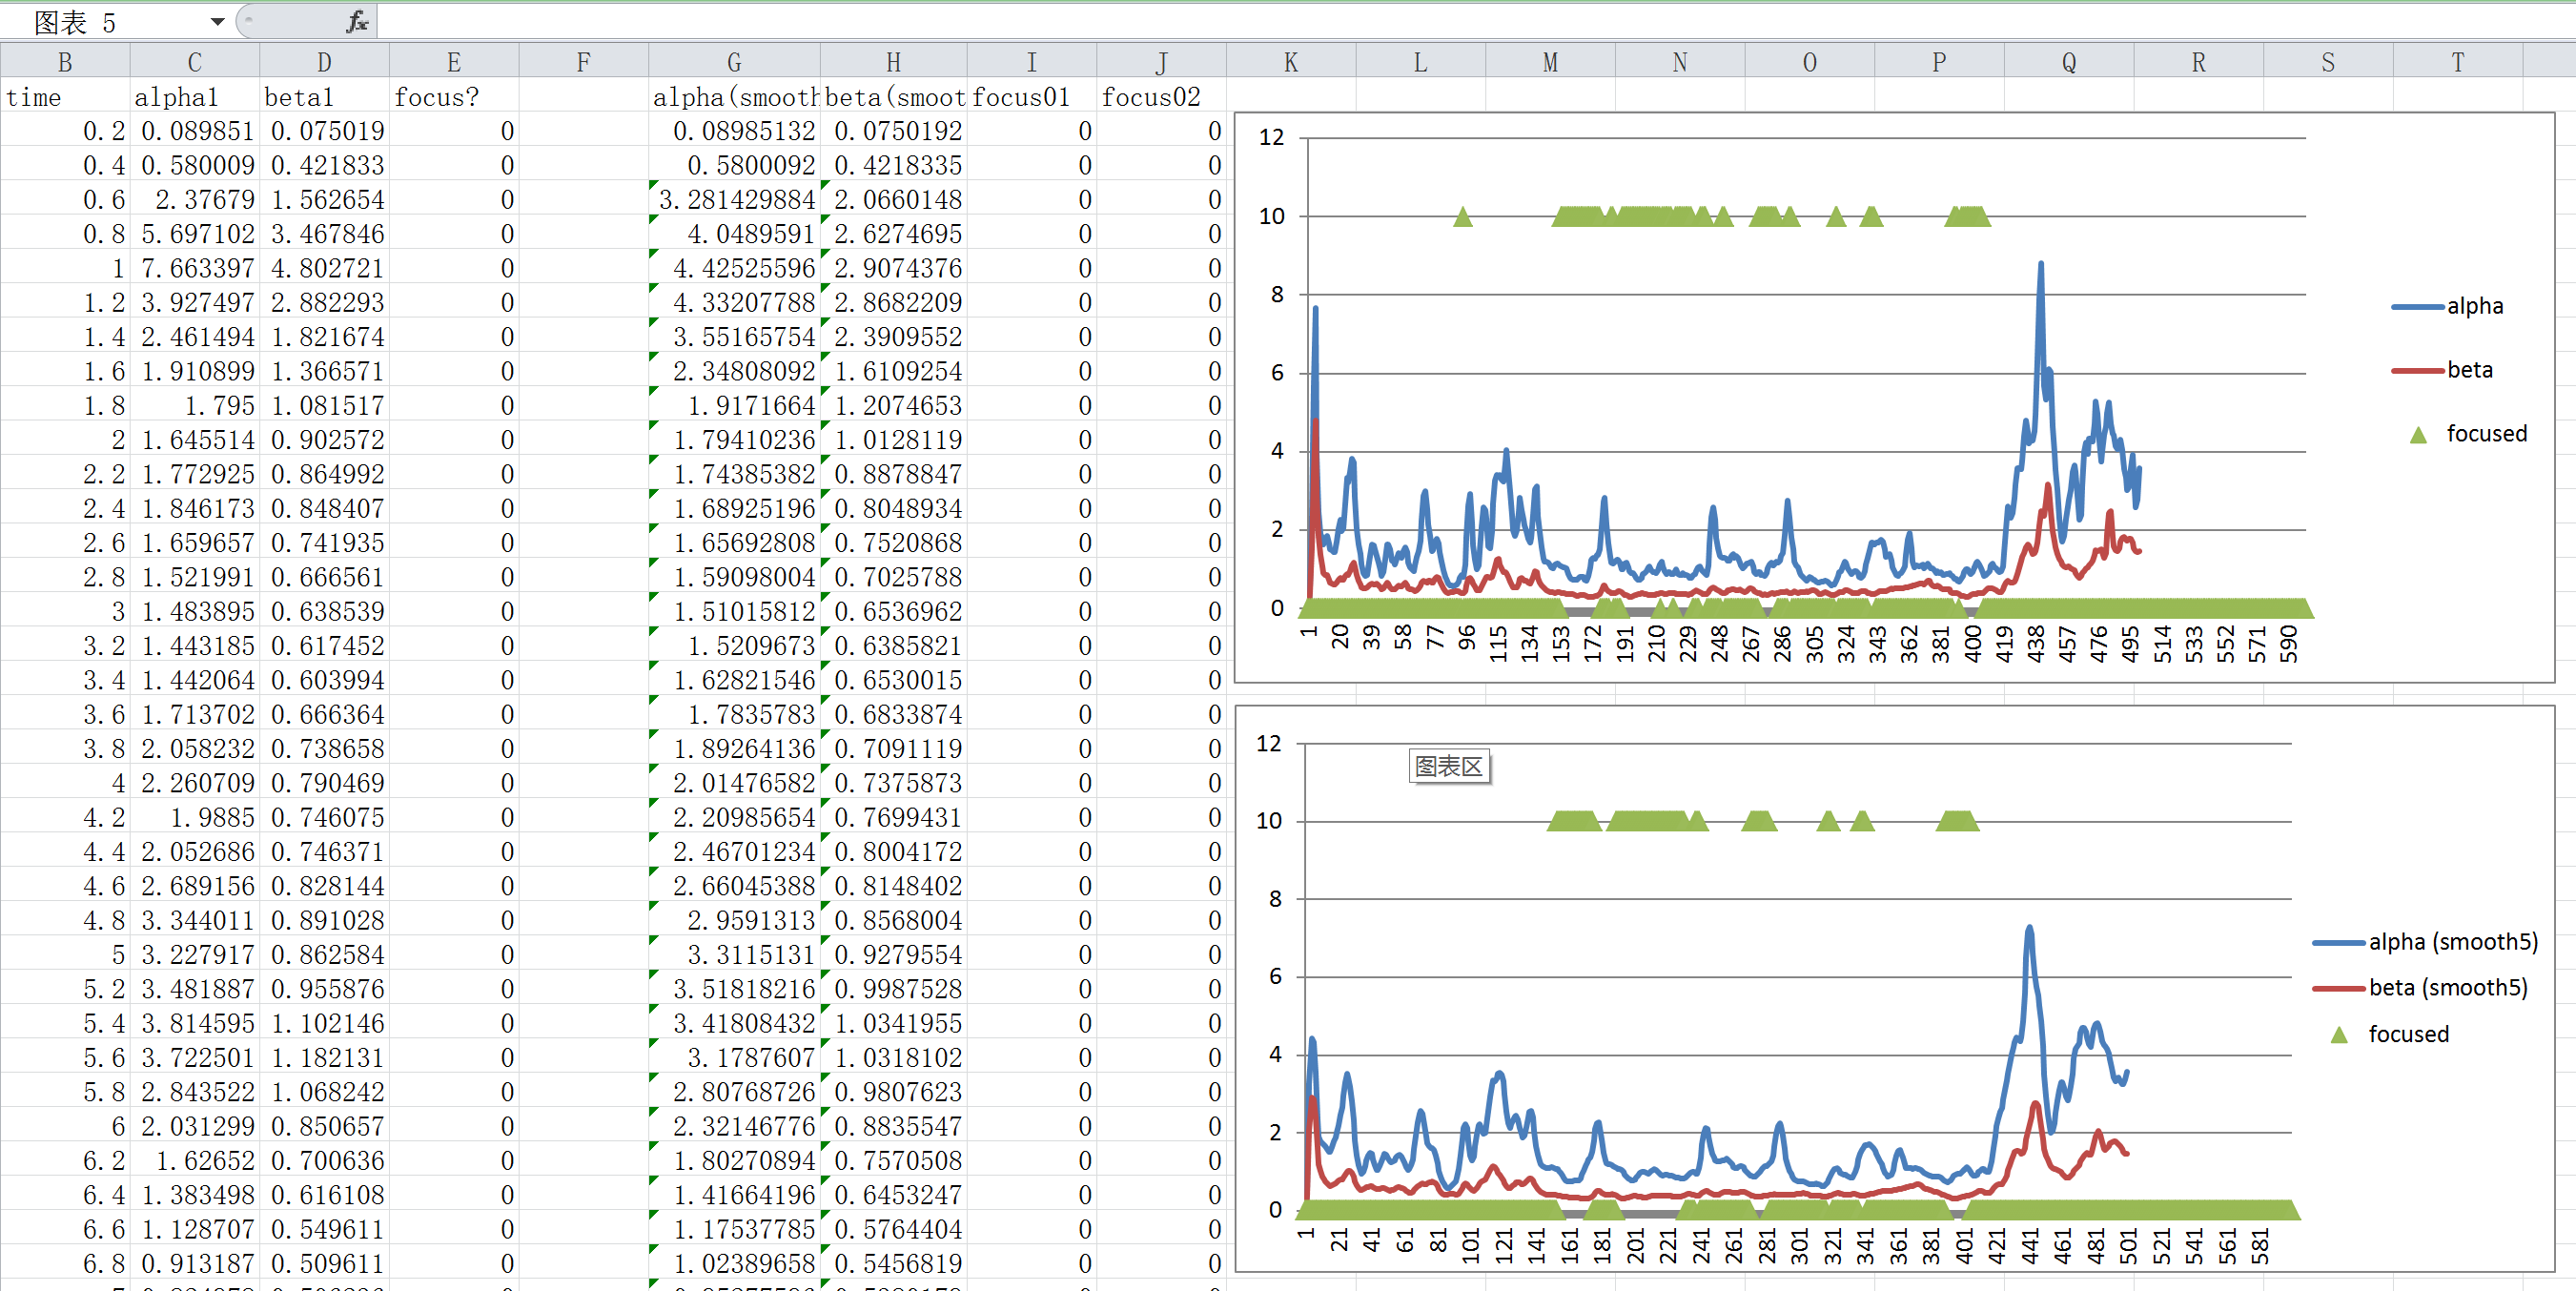
By experimenting with different combination of alpha and beta thresholds, at last I came up with a experiential equation that implements the assumption “high in alpha and low in beta”, with an additional upper threshold of 4uV for noise handling:
Focus == (alpha_average > 0.7uV ) && (beta_average < 0.4uV) && (alpha_average) < 4uV.
After experimenting on multiple people other than Jordan, the threshold of beta was changed from( < 0.4uV) to (< 0.7uV) so it is less critical to trigger.
Later in the spring show it was further changed to:
Focus == (alpha_average > 1.0uV) && (beta_average < 1.0 uV) && (alpha_average < 4 uV)
and it worked well on around 20 testees from young to old when they started to calm down and focus.
Below is the Processing code of focus detection (with old thresholds):
if (alpha_avg > 0.7 && alpha_avg < 4 && beta_avg < 0.7) {
  isFocused = true;
} else {
  isFocused = false;
}
4. Building a game prototype with Unity
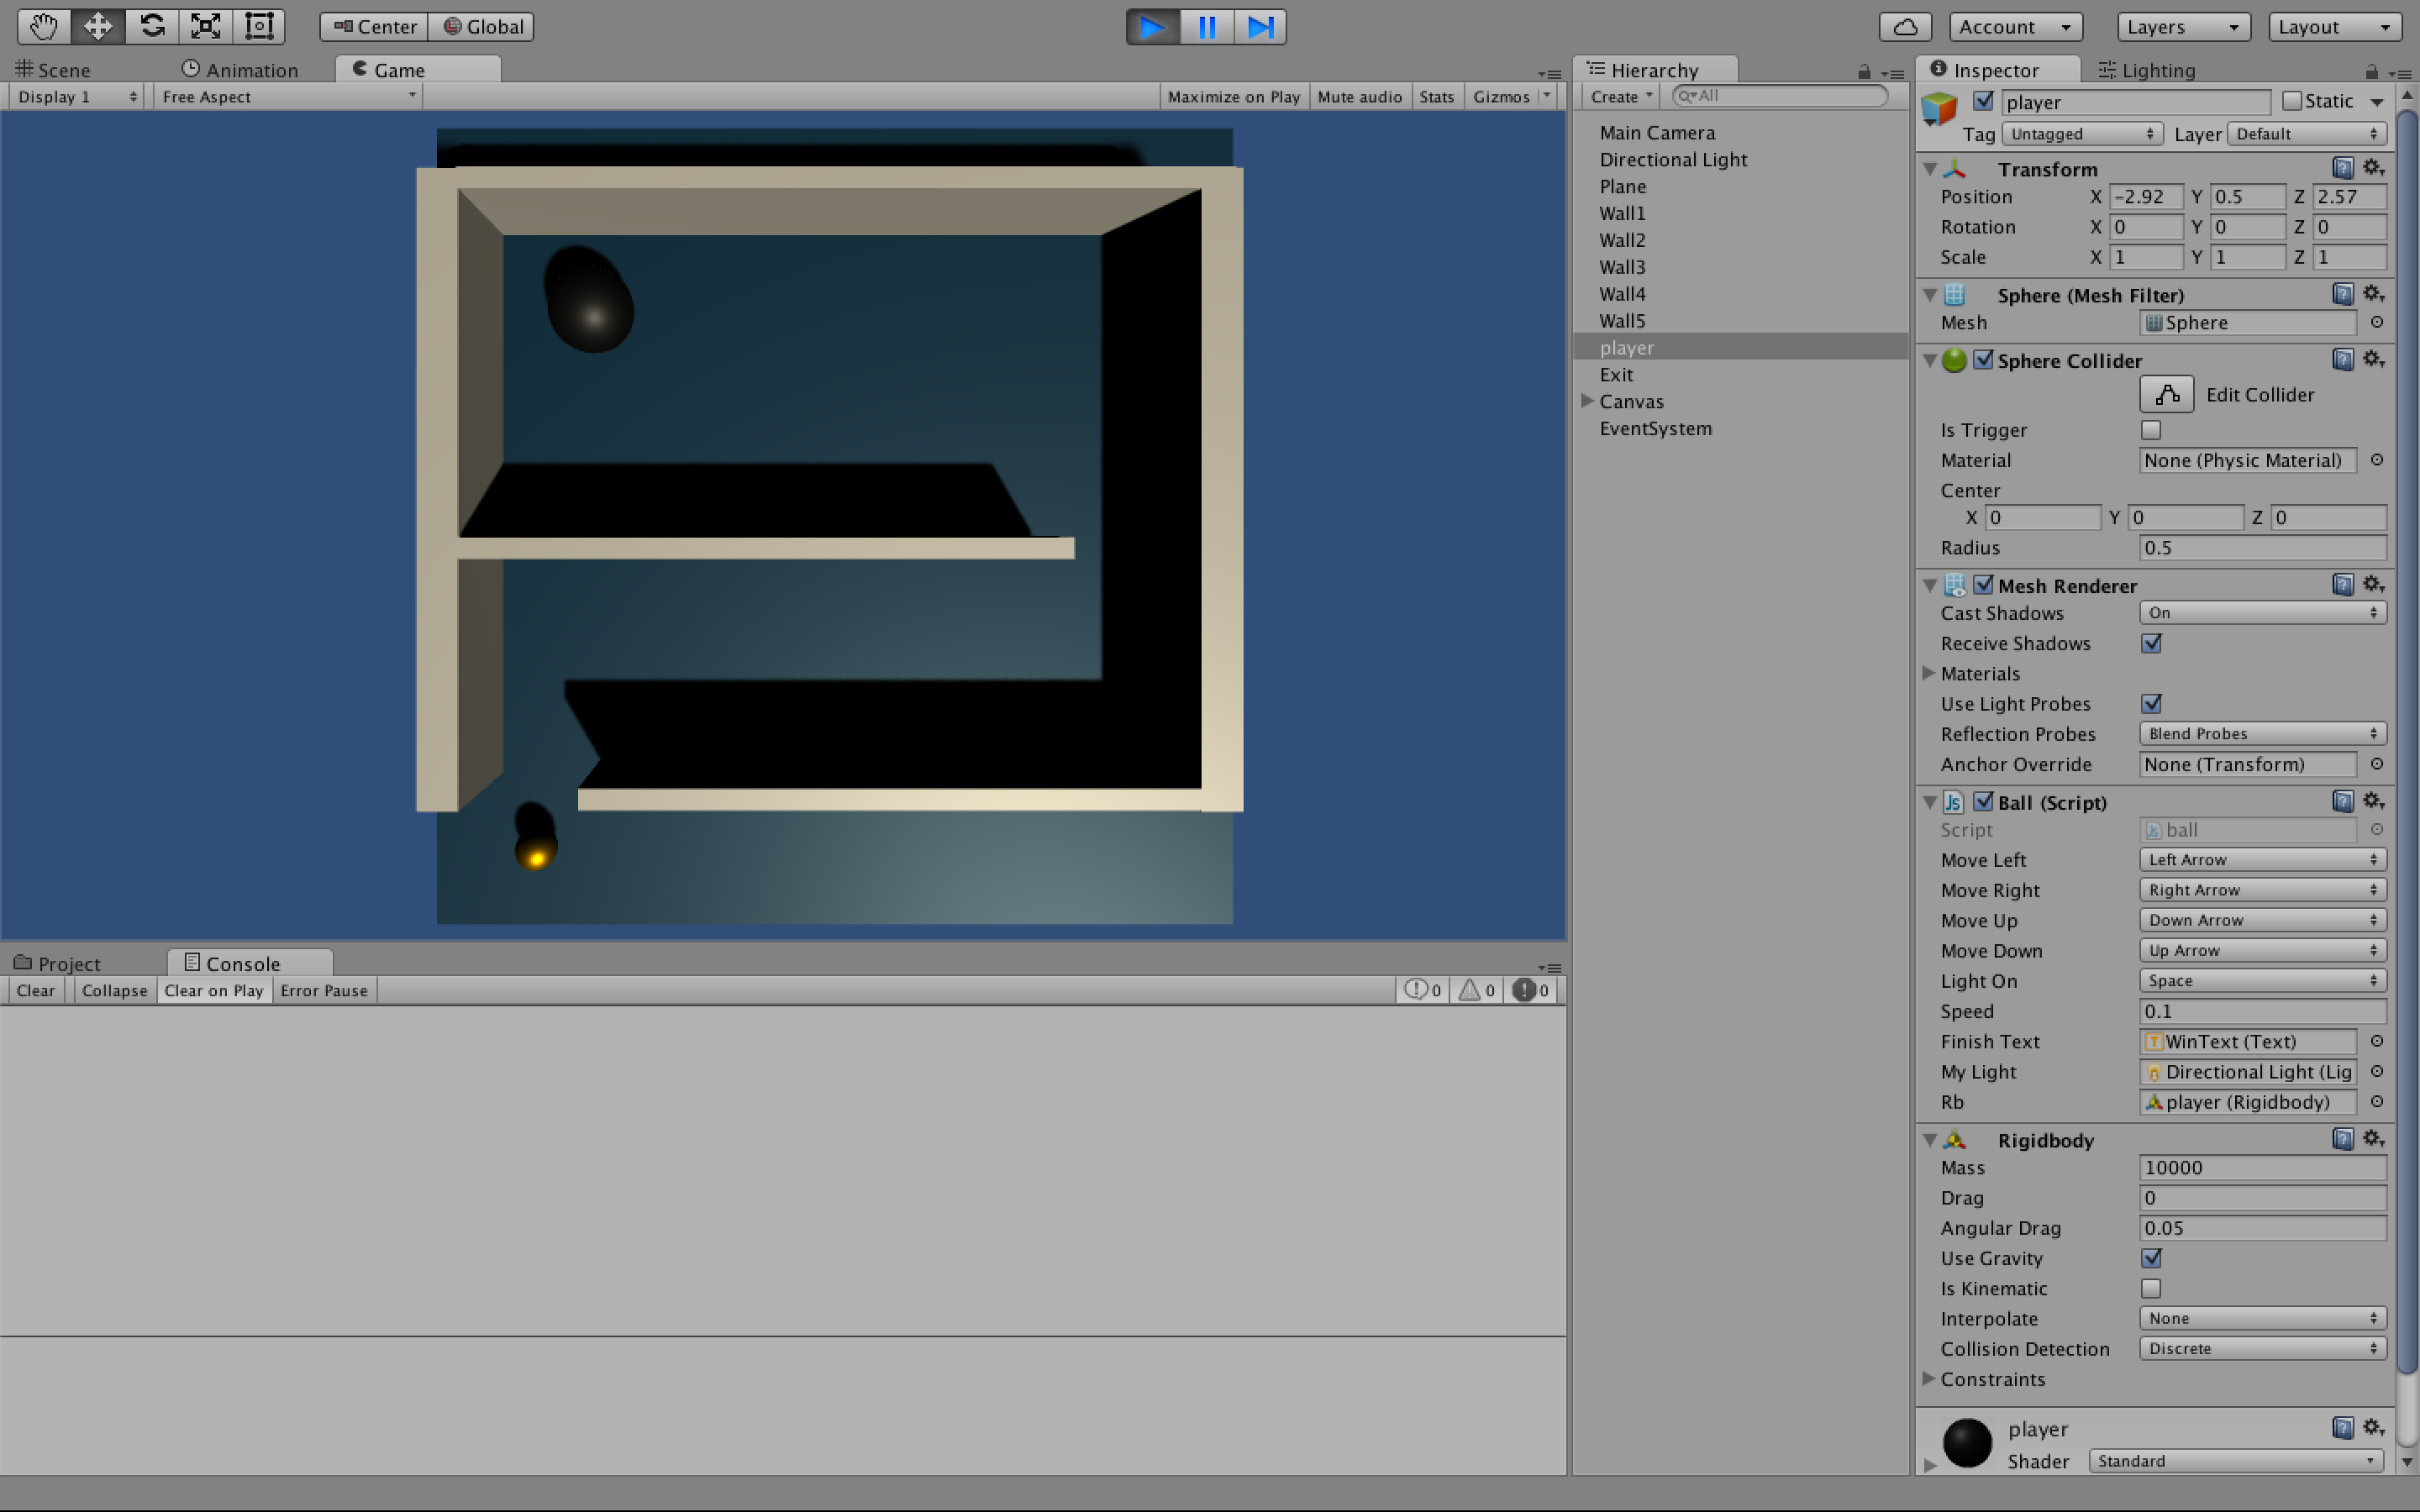
Unity has built-in 3D collision detection, thus making it easy to build our first prototype.
Jordan and I built the prototype based on Unity Roll-a-ball tutorial, so the game is totally dark unless the spacebar is held down to keep the light on. And the movement of the big black ball can be controlled with up-down/left-right arrows. When it finally hits the golden ball at the exit, a win message will show up.
5. Sending events from Processing to Unity
In order to send focus/ eye blinking/ head tilting events to our Unity game, I used the “simulate key stroke” trick learned from another class Digital Fabrication for Arcade Cabinet Design. This “simulate key stroke” feature is provided by Java Robot, and we can use it because Processing is based on Java. So basically whenever there is an event detected (e.g. focused, lean forward), Processing will send a keyPress() or keyRelease() event of either spacebar or arrow keys to play the Unity game. Since it is literally the same as playing the game with keyboard, we don’t need to add anything in Unity.
Below is the simulating key stroke code in Processing.
Import packages:
import java.awt.AWTException;
import java.awt.Robot;
import java.awt.event.KeyEvent;
Robot robot;
In setup():
try {
  robot = new Robot();
} catch (AWTException e) {
  e.printStackTrace();
  exit();
}
In draw():
if (isFocused) {
  robot.keyPress(KeyEvent.VK_UP);
}
else {
  robot.keyRelease(KeyEvent.VK_UP);
}
Actual gameplay:
Dark Maze V2: the physical maze
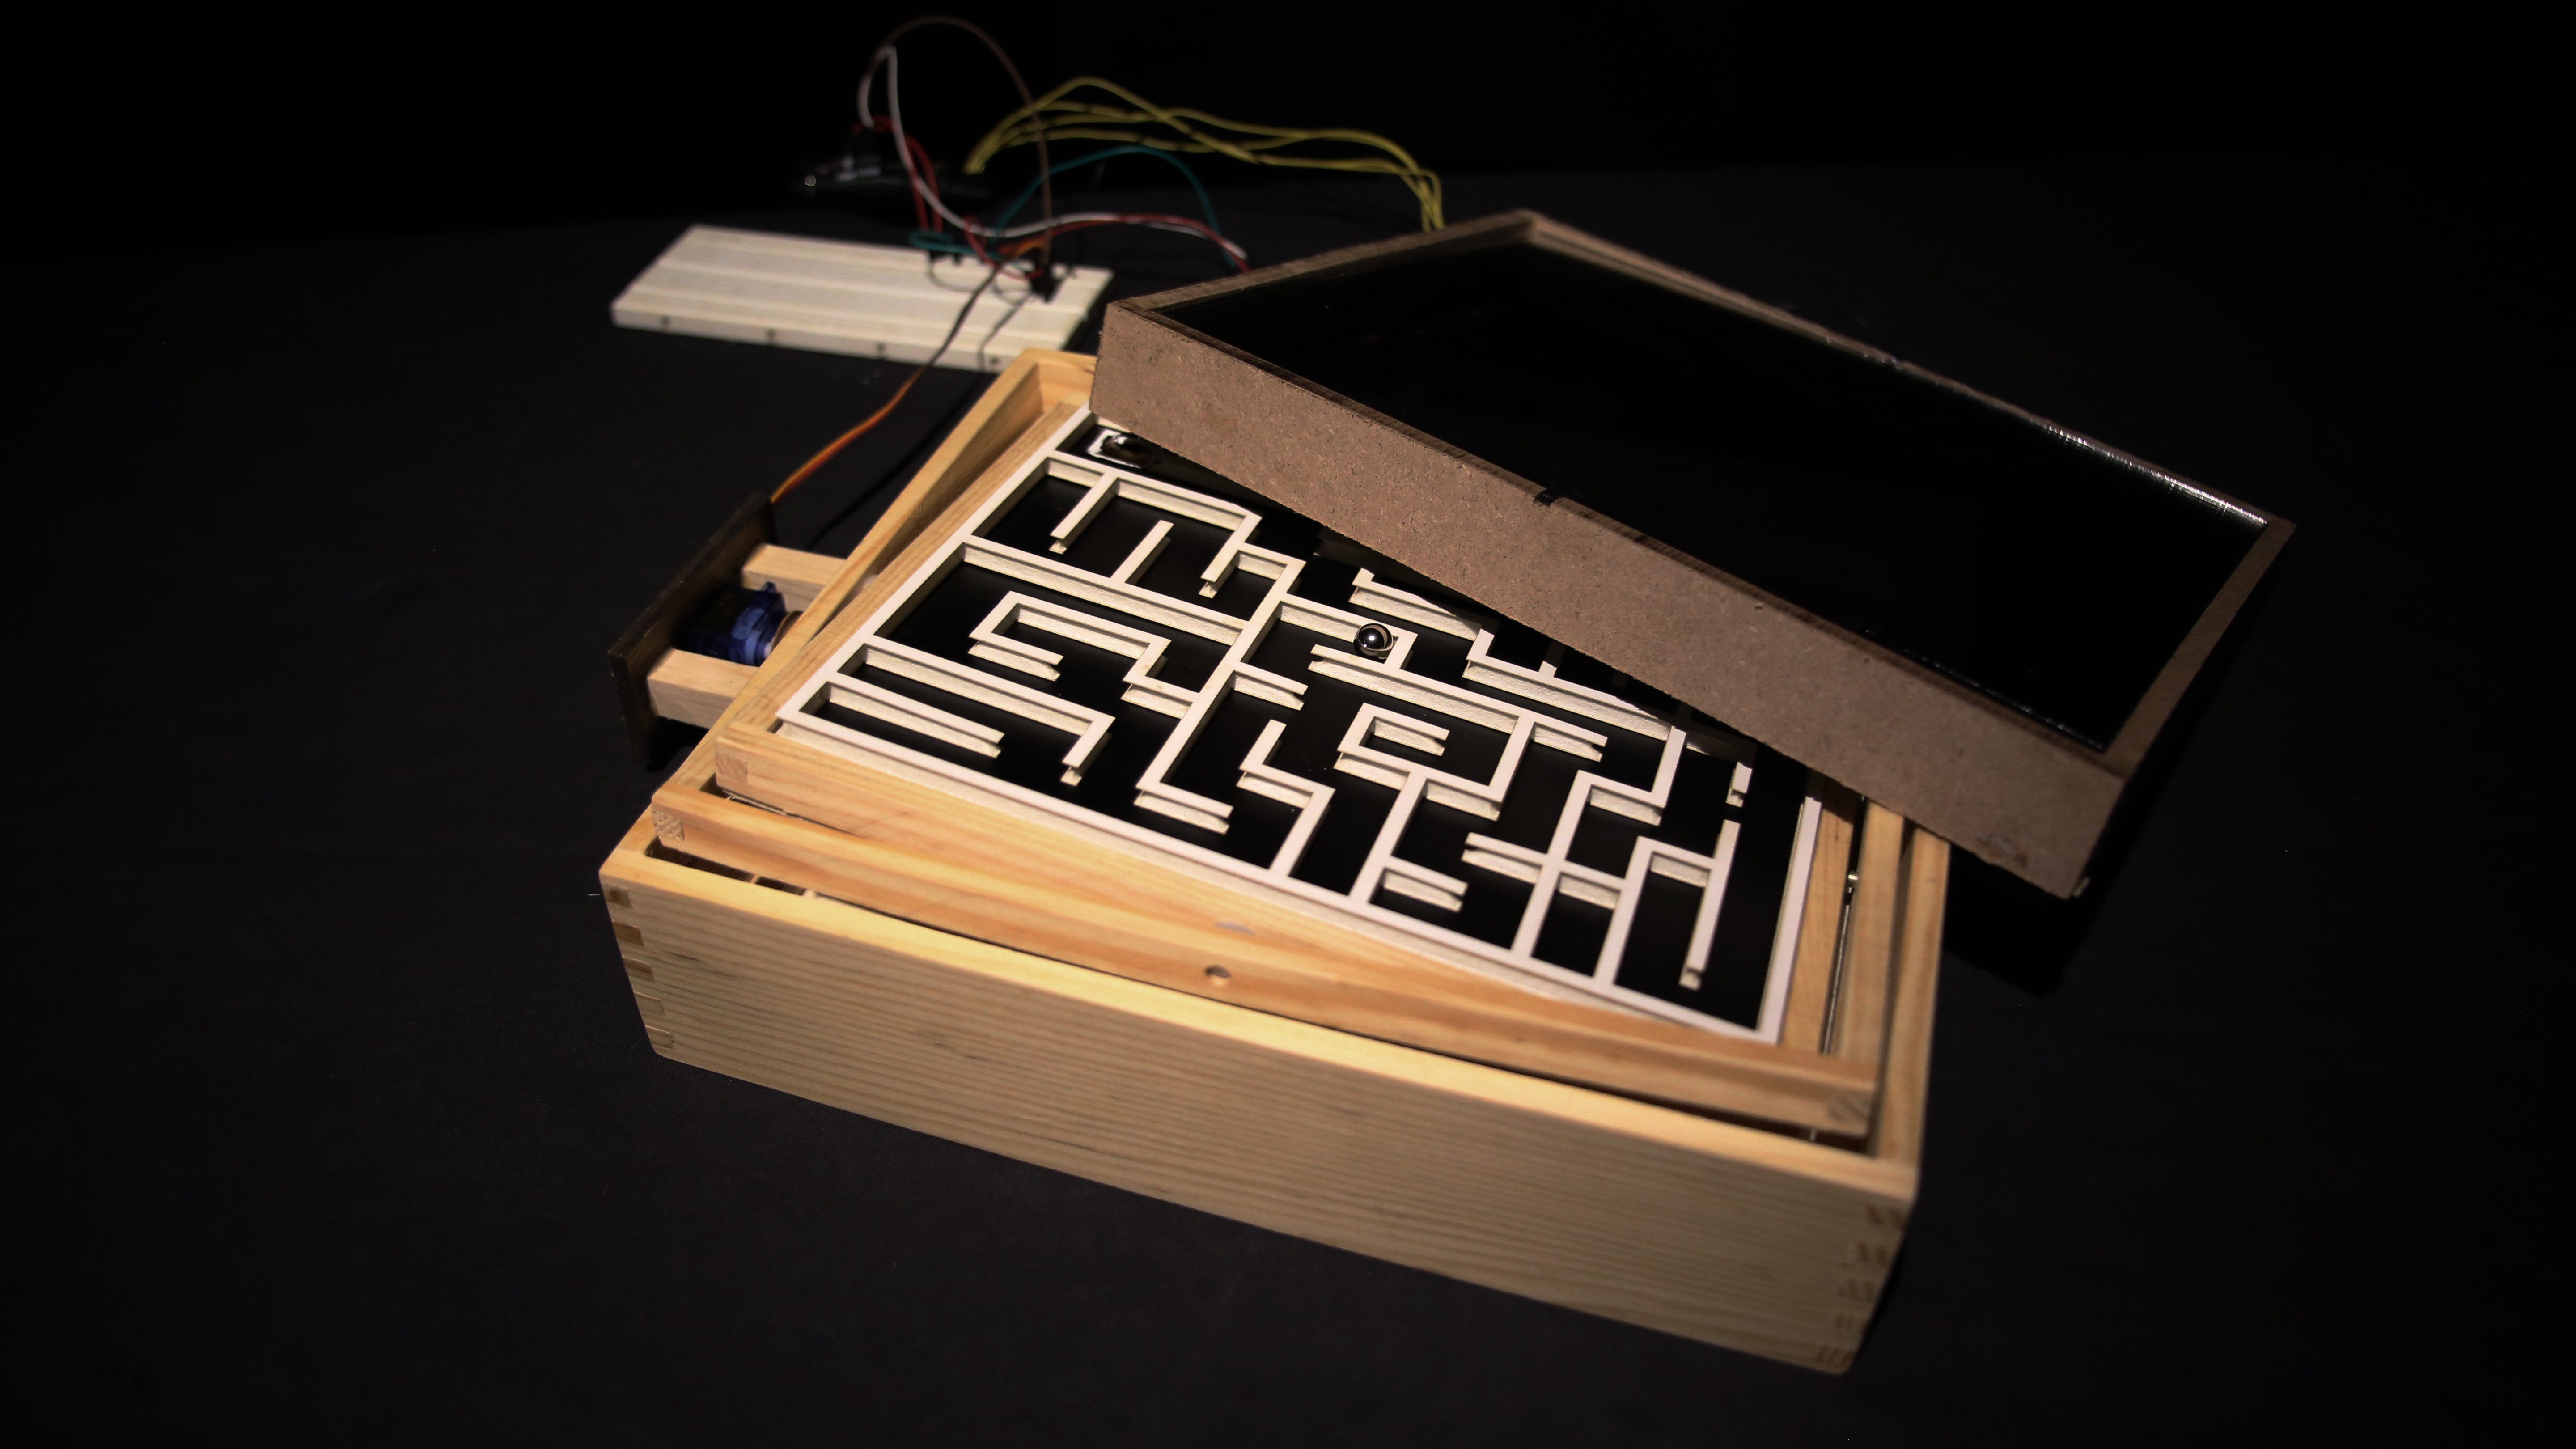
We wanted to use big electromagnets to control the ball, but it turned out to be not that powerful so we eventually decided to switch to tilt maze.
To save time we didn’t build the maze per se but rather hacked a readymade maze, with our own laser-cut maze built on top, and a one way mirror acrylic to block the content.
For controller part we glued two servos to the two knobs of the original maze, and added a bunch of LEDs around the inner side of the mirror. Processing will send five values continually (up, down, left, right, focus) to Arduino Uno to control the maze.
Final test video:
More details are well documented in Jordan’s blog: